
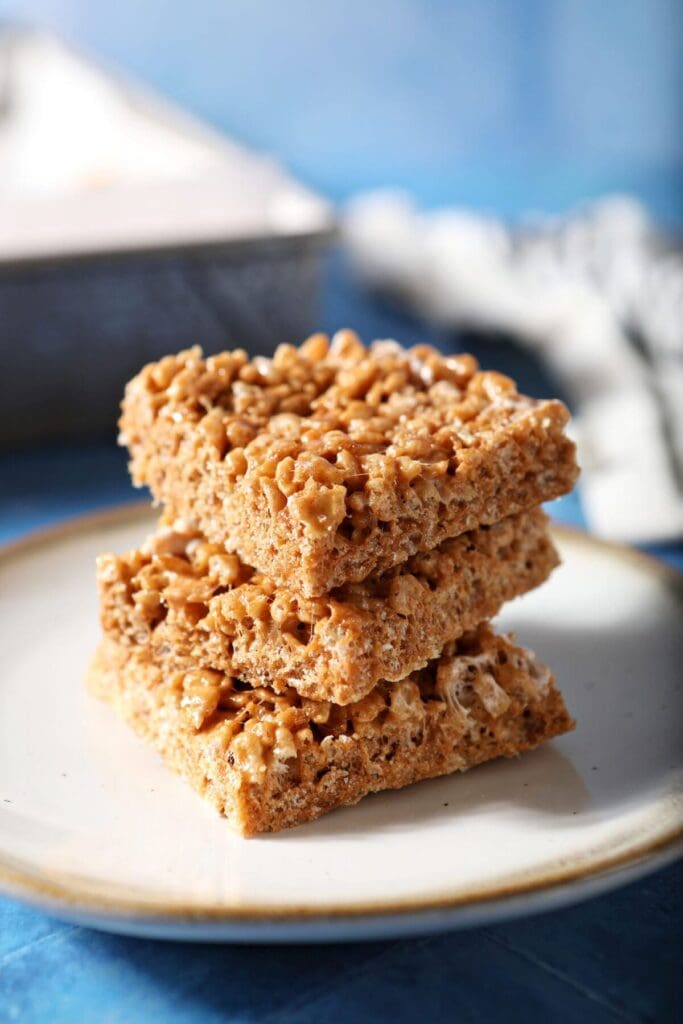
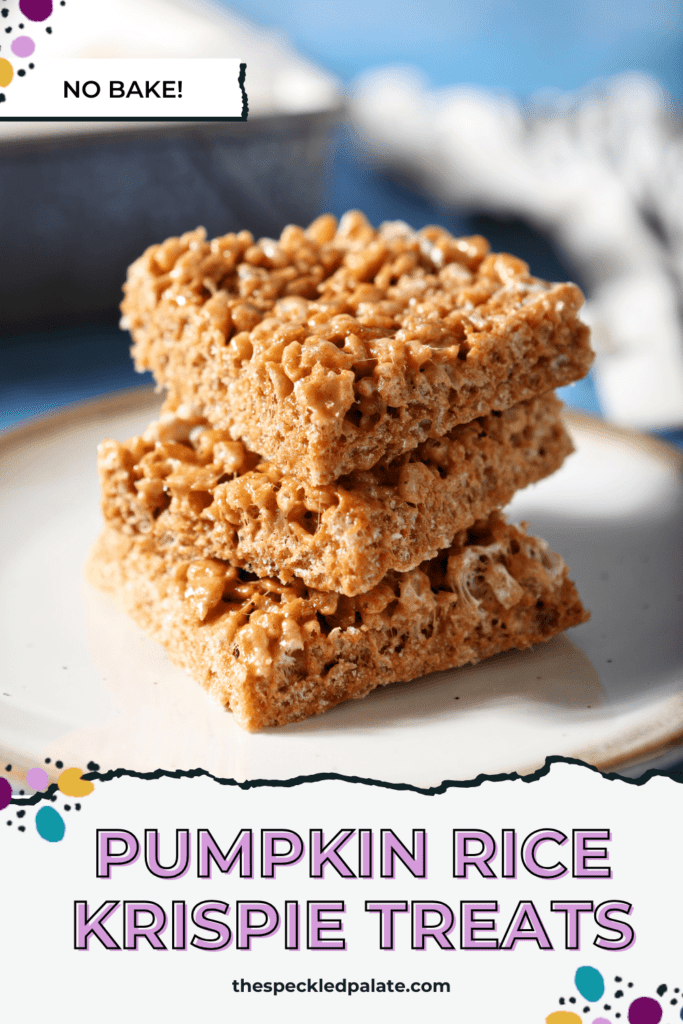
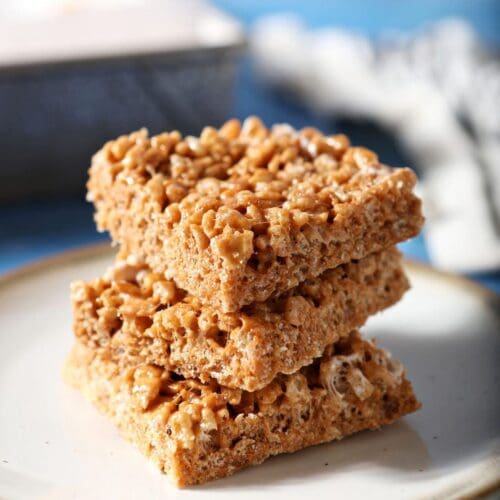
Pumpkin Spice Rice Krispie Treats
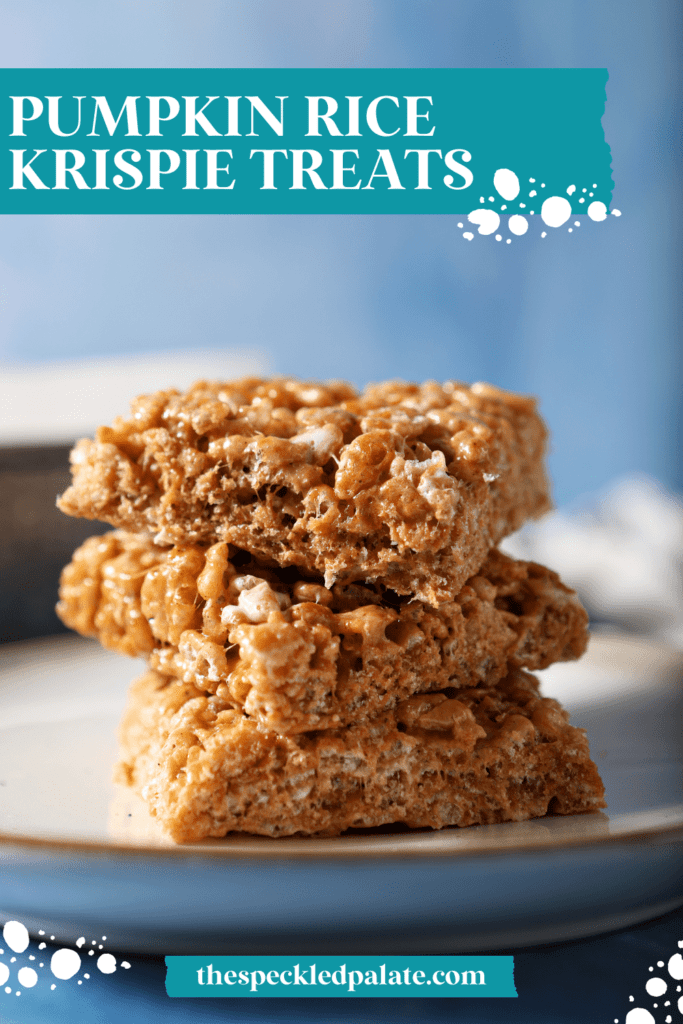
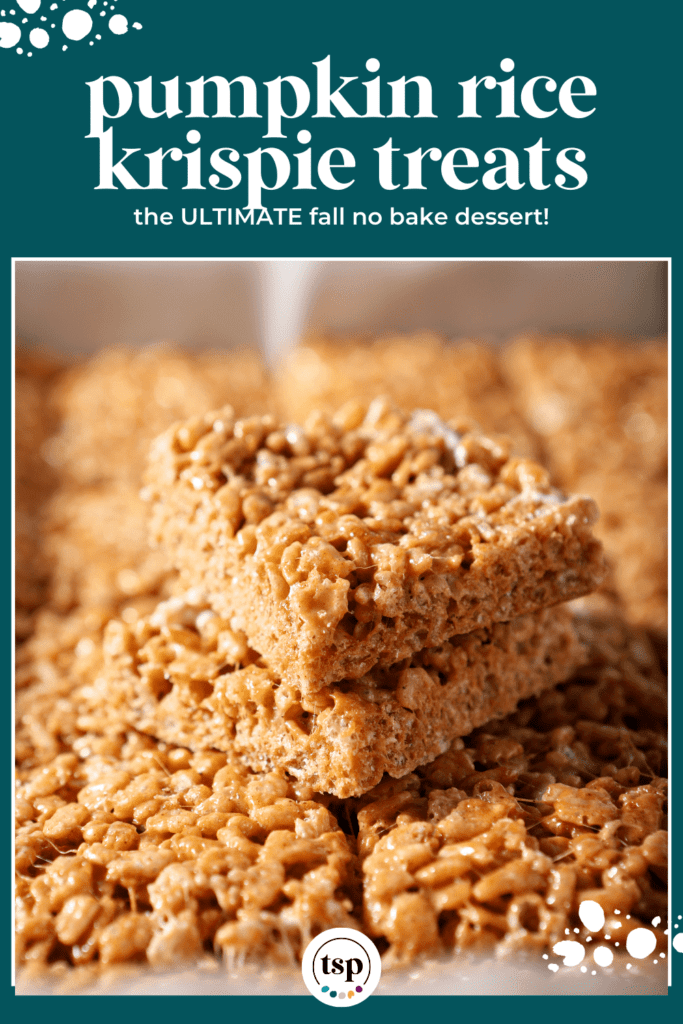
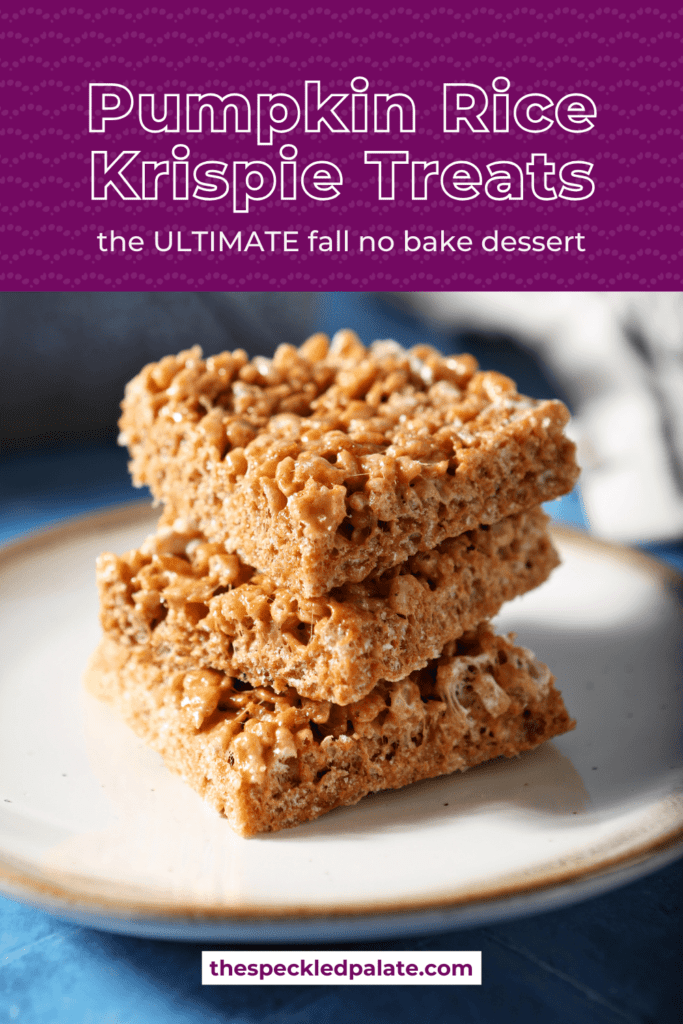
Pumpkin Spice Rice Krispie Treats are the ULTIMATE fall no bake dessert! This easy recipe is packed with pumpkin spice flavor and chewy, crispy rice krispie treat texture. Make a batch of these for a Halloween party or tailgating — they’re perfect for sharing! Makes 24 treats.
This post contains affiliate links.
Let it be known: the flavor combination of pumpkin spice has not always been my jam because I do not love nutmeg.
BUT these Pumpkin Spice Crispy Rice Treats are EXCELLENT and a fun twist on the classic treat.
There’s something incredible about a dessert that doesn’t require you to turn on the oven that also has awesome flavor… and these are exactly that. They also call for simple ingredients!
Why I love this recipe:
Pumpkin Spice Rice Krispie Treats… honestly, they’re the perfect fall-flavored dessert and SO easy to make, too.
Please note that these are NOT Rice Krispie Treat Pumpkins, complete with a mini tootsie rolls (or a pretzel stick or a rolo candy) stems. So if you’re wanting to make pumpkin shapes, this is not the recipe or tutorial for you.
However, let me just go out and say that these Pumpkin Rice Krispies Treats are beyond lovely for so many reasons:
- You don’t have to turn on the oven. And while you do have to use the stovetop, it’s not on for long to get the job done.
- The flavor is scrumptious — you’ve got the classic rice krispie treat texture paired with the warming pumpkin spice flavors of cinnamon, ginger and allspice.
- This type of dessert is perfect for any type of fall gathering, assuming you and your people love this flavor combination. (They would be delightful on a Thanksgiving dessert table, too, or even fall potlucks.)
- This rice krispie treat recipe is easy to transport, too, so they’re an easy to bring on the road, too.
Even my husband, who never loves a crispy rice treat, said these were exceptional. And that is saying something!
All this is to say: these sweet treats are so much fun to make and eat and really celebrate the flavors of the season.
Other no bake desserts to make this season: No Bake Peanut Butter Bars with Pretzels | Cinnamon Sugar Pretzels | Dark Chocolate Peanut Butter Cups | No Bake Avalanche Cookies | Chex Mix Puppy Chow
Got sweet teeth? Check out my Dessert Recipe Index for inspiration.
What you need to make this recipe:
The Speckled Palate participates in affiliate programs. As an Amazon Associate, I earn a commission from qualifying purchases. Please refer to my disclosure page for more information about these affiliate programs.
- Nonstick cooking spray
- Wax paper or parchment paper
- A large pot (like a 6-7 qt. Dutch oven large) or a large saucepan
- 9”x13” baking dish
- A large mixing bowl
- Rubber spatula
- Metal spatula
Let’s talk ingredients!
In addition to the tools above, you’re going to need some ingredients to make this recipe, too! Chances are, you might already have some of them in your fridge or pantry. Scroll down to the recipe card for the full measurements and instructions.
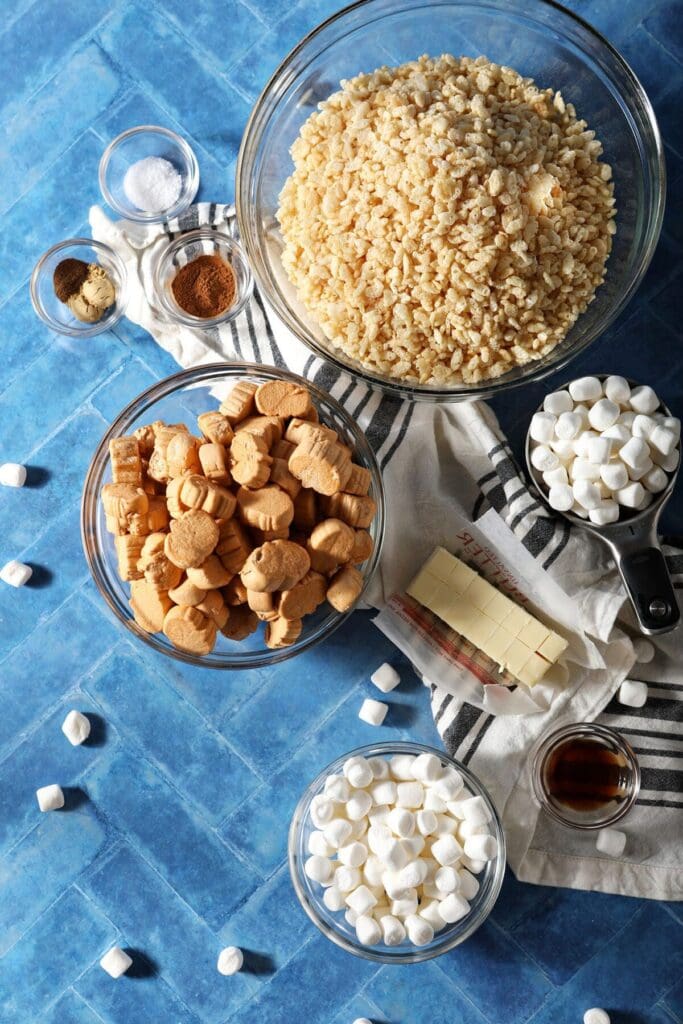
Here’s what you’ll need to grab at the grocery store to make these easy treats:
- Crispy rice cereal — use your favorite brand! I’ve been known to make these with the whole wheat variety for my kids, but any variation is good. Please note that classic Rice Krispies cereal is not gluten-free, if that’s something that is important to you and who you’re sharing these treats with.
- Butter — you can use salted or unsalted butter. If using salted butter, don’t add the salt. If using unsalted butter, you need a little extra sprinkle of salt. I have more details about this below so you know how much to add, promise.
- Vanilla extract — this adds just a little more flavor, in my opinion, and the combination of vanilla with marshmallow and butter is simply divine.
- Marshmallows — we’re using a combination of pumpkin spice marshmallows (in the shape of little pumpkins) and mini marshmallows. Be sure yours are fresh so they melt easily!
- Spices — to get that pumpkin spice flavor, we’re going to combine ground cinnamon, ground ginger and allspice. You can add a pinch of nutmeg, too, if you like it. (I do not.) You could also use the same amount of pumpkin pie spice, if desired.
Please note that we’re not adding drops of orange food coloring to give these treats an orange color. We’re also not using pumpkin puree to make them truly pumpkin-y. We’re leaning on the pumpkin spices to make them what they are.
Rice Krispy Treats variations
- Holiday variations, like Easter Rice Krispie Treats with Peeps and Christmas Rice Krispie Treats
- Salted Bourbon Butter Rice Krispie Treats
- July 4 Rice Krispie Treats
- Chocolate Rice Krispie Treats
- Gingerbread Rice Krispie Treats
How to make this Pumpkin Rice Krispie Treats recipe
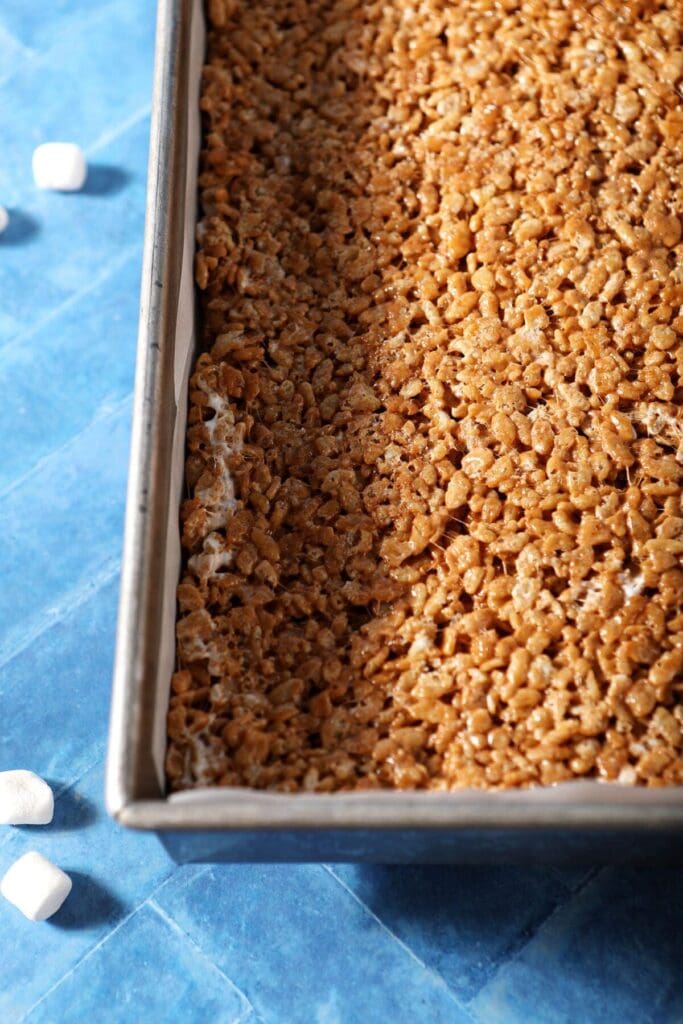
Prepare the pan. I like using a 9”x13” baking dish and lining it with wax paper. This will make removing the crispy rice treats easy. You can also give the paper a spritz with nonstick cooking spray to ensure your treats will remove easily. Set aside.
Measure out the cereal into a large bowl, and set aside. We won’t be mixing these in the bowl, but having this measured out before our marshmallow-butter mixture is melty is important.
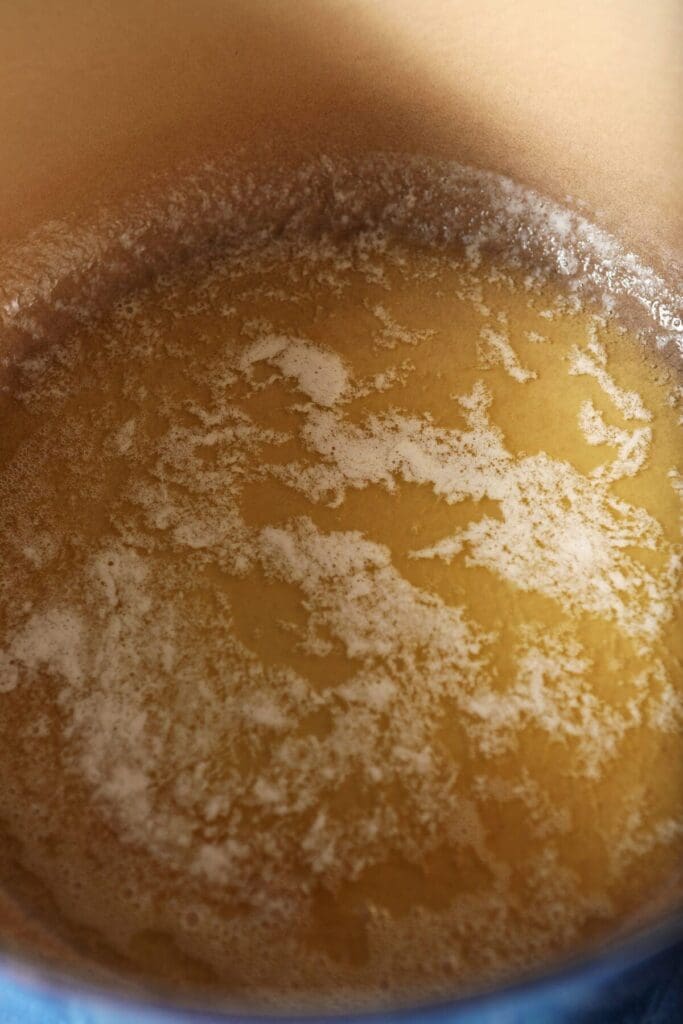
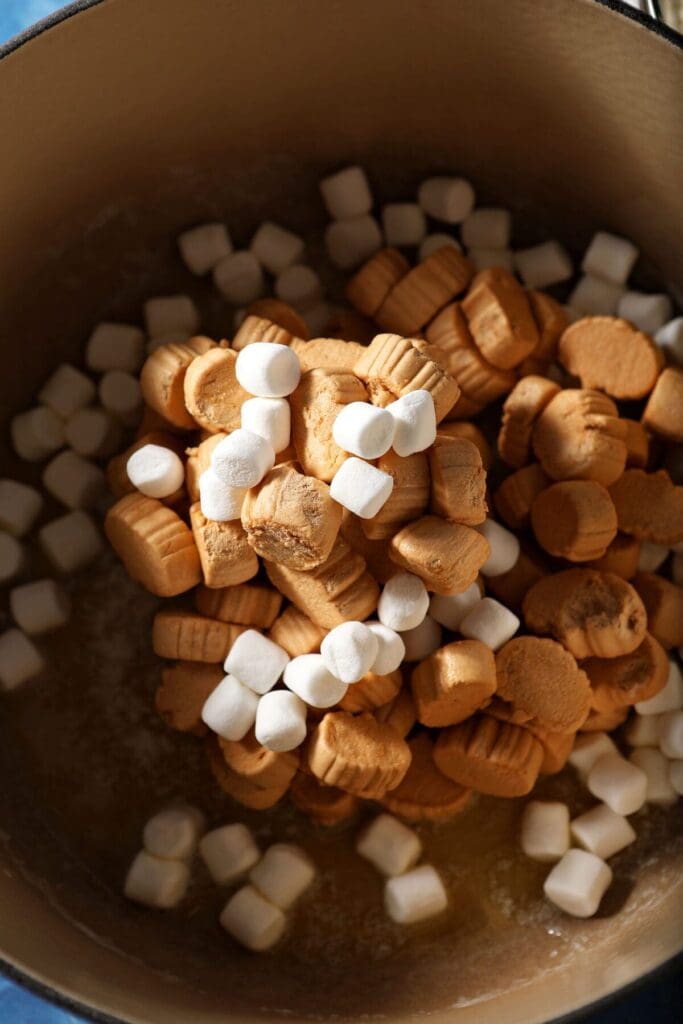
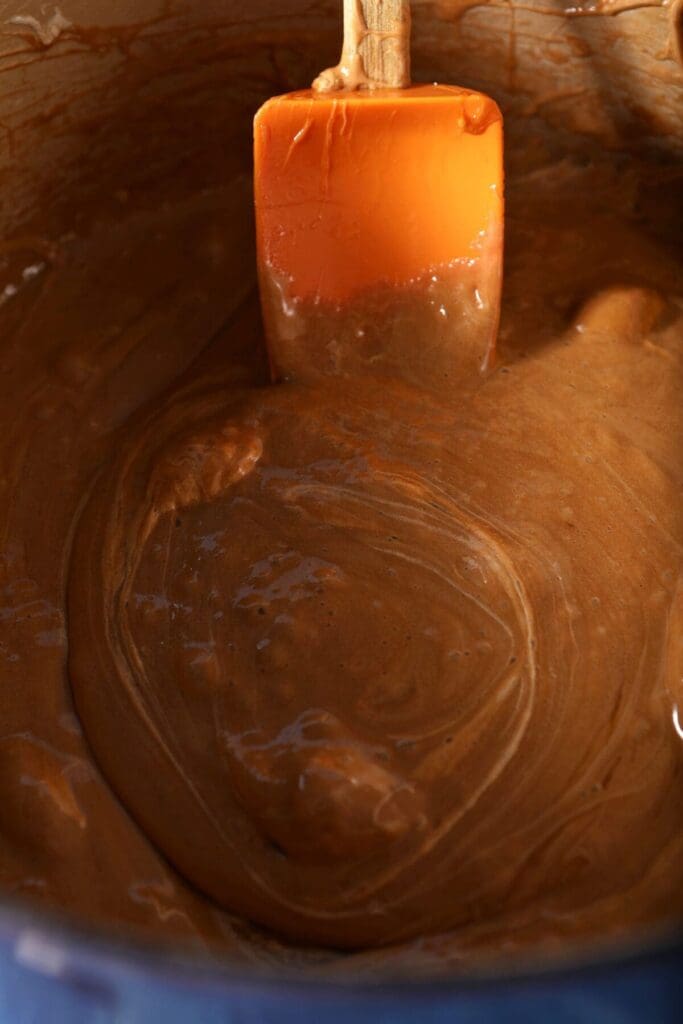
Make the treat base. In a large pot, melt butter over low heat with the salt, then stir in the marshmallows. Continually stir until these have melted completely, then splash in the vanilla and stir.
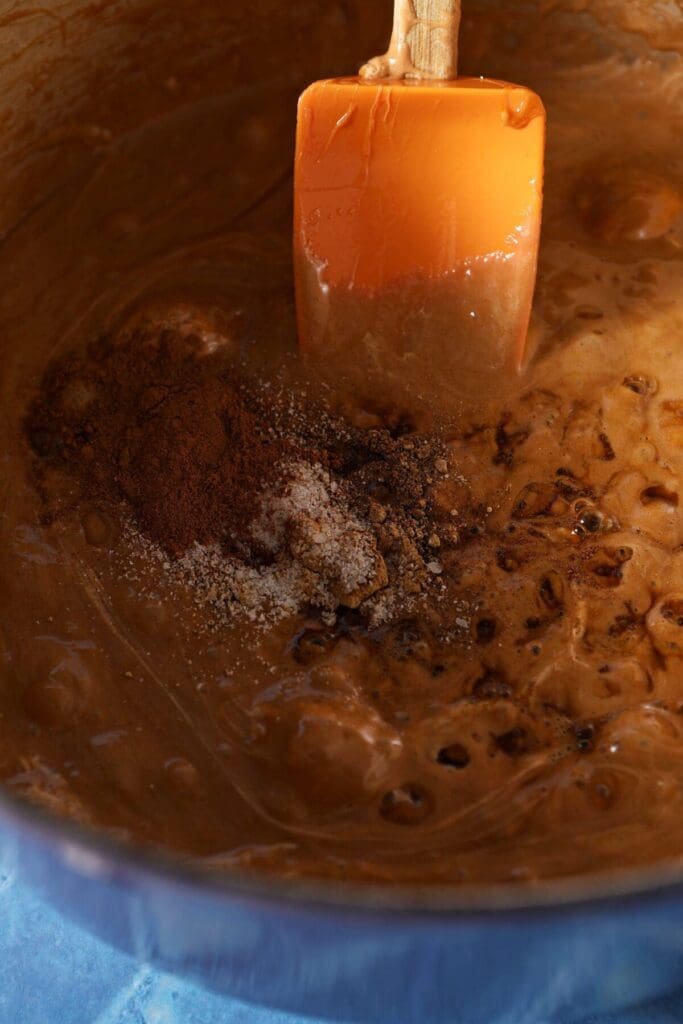
Add the spices to the melted marshmallows. Throw in the cinnamon, ginger and allspice, stirring until incorporated.
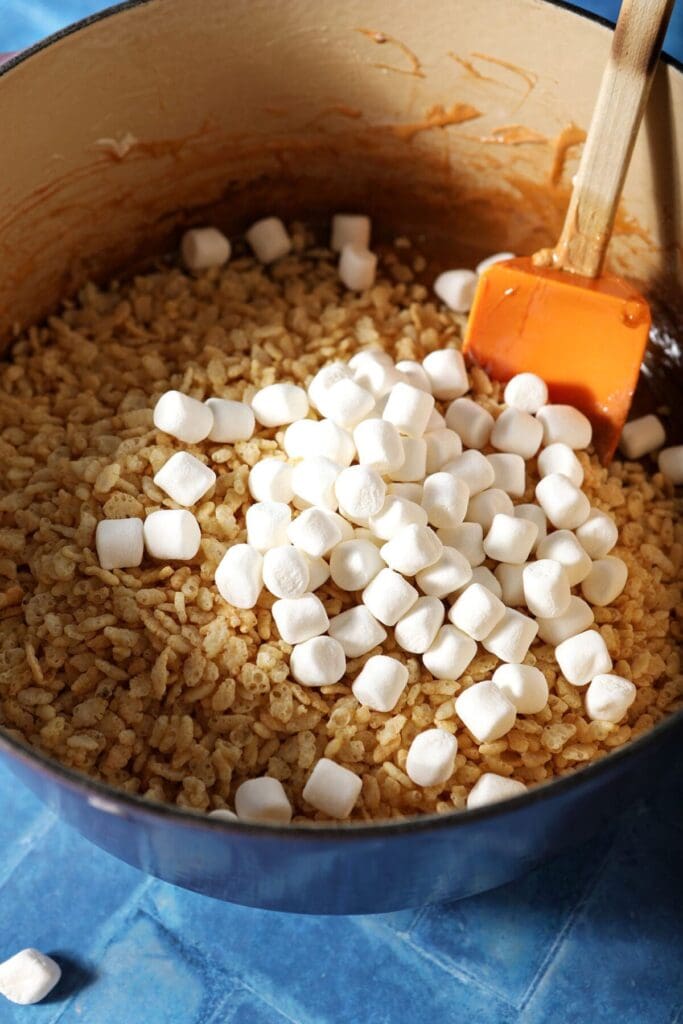
Mix the treats. Turn off the heat, and pour the cereal into the pot with the marshmallow mixture. Stir quickly until the cereal is completely coated.
Add the extra cup of mini marshmallows to the rice krispie mixture, and stir until those are scattered throughout the mixture.
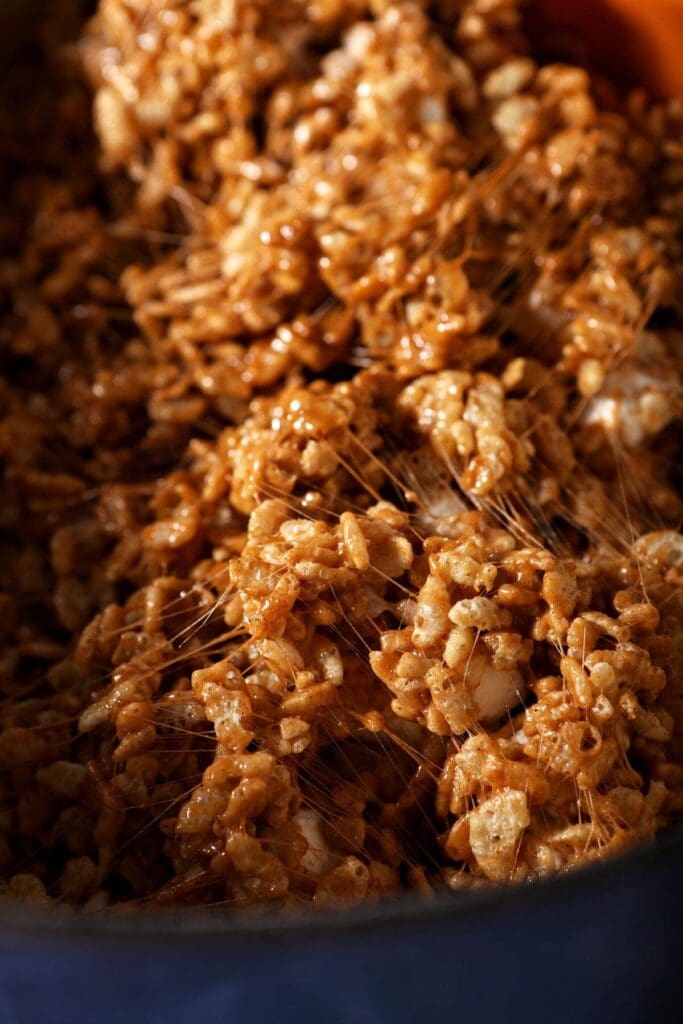
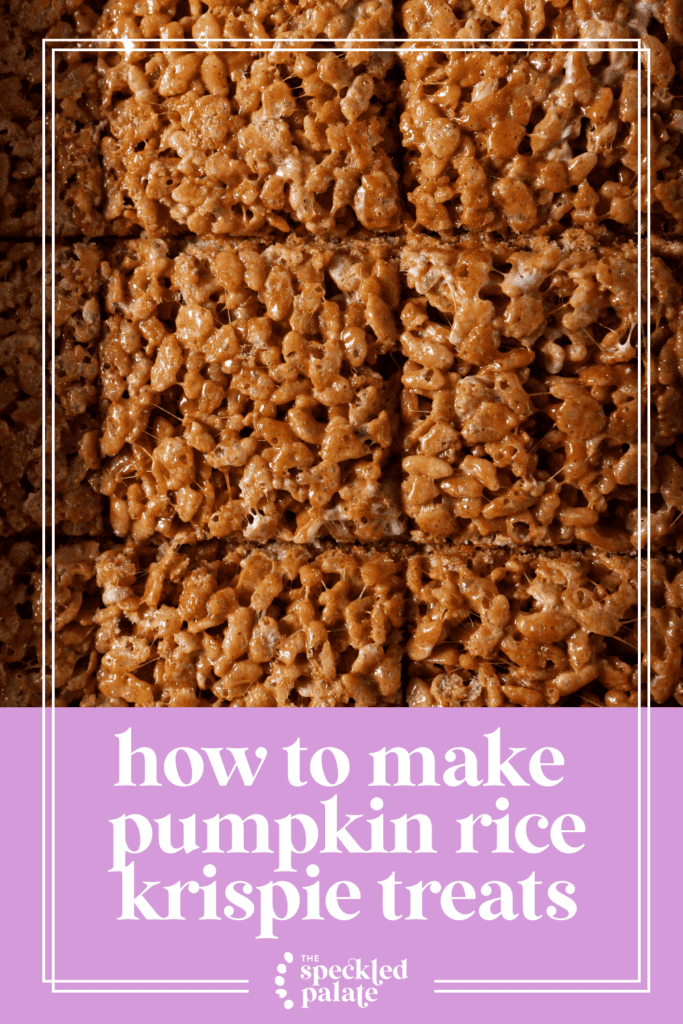
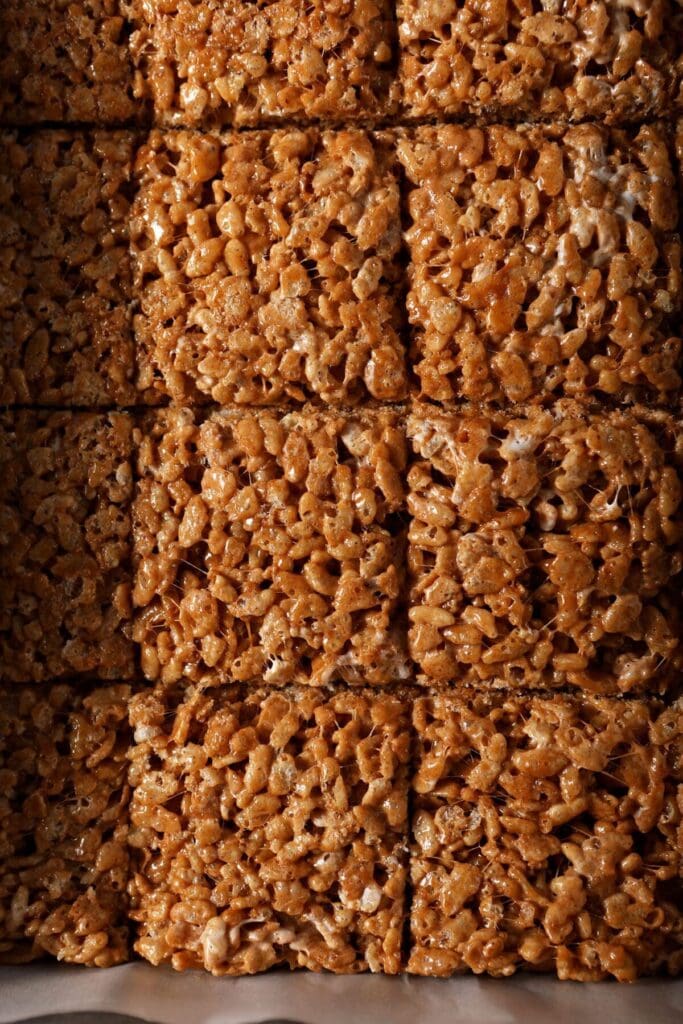
Make the bars. Pour the mixture into the prepared baking pan. Gently spread it into an even layer with a rubber spatula. Press the mixture into the pan.
If your spatula begins sticking, spritz with the nonstick cooking spray.
Pro tip!
Do not press down hard on the mixture because this will make your treats more compact.
Let the treats cool for about an hour, then cut into rectangles with a sharp knife.
Erin’s Easy Entertaining Tips
No bake desserts are the perfect sweet treat for casual entertaining because they tend to take less time and are, well, easy to put together. They’re also easy to serve.
Here’s how I would make and serve these cereal treats for any fall-flavored get together:
- Make the treats earlier in the day. The bad thing about these is that they don’t keep for a long time, so they need to be made the day of.
- Transform them into shapes. Use a cookie cutter to cut out the treats and decorate them accordingly. Just be sure to do this before the mixture completely cools.
- Make a rice krispie treat table. These would be super cute served alongside Halloween Rice Krispie Treats and Halloween Oreo Rice Krispie Treats on a dessert table at Halloween parties. Just keep these ones separate since the warming spice flavor WILL creep into the others.
- Send guests home with leftovers. That way, they stand a better change of being consumed before they become more challenging to eat.
Frequently Asked Questions
Marshmallows are an integral part of krispie treats, so I do not recommend finding a substitute for them.
It’ll be partially dependent on the weather (and if it’s raining/humid where you are, it might take longer), but 30 minutes to an hour is the general timeline.
If your treats are hard as a rock, it could have something to do with the fact that the heat was too high as you melted the marshmallows, which could cause the sugars to crystalize.
No. As marshmallows sit in the pantry, they lose moisture and their texture changes. They will have a harder time melting, and when they do, they will become more of a gelatinous blob. They run the risk of overcooking and making tougher krispie treats because you’ll need to cook them for longer.
Use the same amount of regular marshmallows… and double the pumpkin pie spice ingredients for the same awesome flavor.

Quick Tips and Tricks for the best crispy rice treats
- Use fresh marshmallows. They melt more easily and will provide a better texture for your treats. (How do I know this? I’ve attempted this recipe with older marshmallows, and they didn’t turn out quite right.)
- Don’t skimp on the spices. The pumpkin pie spice blend is what makes these treats really special!
- Add frosting. These would taste amaaaazing with Brown Butter Frosting, if you’re looking to make them more decadent.
- Store in an airtight container at room temperature for 2-3 days. After this, the treats will begin to harden. Do not store with other treats because the warming spices will soak into those.
More rice krispie treat and cereal bar recipes:
- Oreo Rice Krispie Treats
- Chocolate Rice Krispie Treats
- Salted Nut Roll Bars
- Layered Cereal Treat Bars
Pumpkin Spice Rice Krispie Treats
Ingredients
- 6 tablespoons unsalted butter 80g
- ½ teaspoon kosher salt
- 8 oz. pumpkin spice marshmallows
- 4 oz. mini marshmallows divided (2 cups)
- 1 teaspoon pure vanilla extract
- 1 teaspoon ground cinnamon 3g
- ½ teaspoon ground ginger 2g
- ¼ teaspoon allspice .75g
- 6 cups crispy rice cereal 7.2 oz. or 200g
As an Amazon Associate and member of other affiliate programs, I earn from qualifying purchases.
Instructions
- Line a 9”x13” baking dish with wax paper. This will make removing the crispy rice treats easy. Set aside.
- Pour the crispy rice cereal into the large bowl, and set aside.
- In a large pot, melt the butter over low heat. Season with salt, if using unsalted butter.
- Once the butter has melted, stir in the pumpkin spice marshmallows, as well as a cup of the mini marshmallows. Continually stir until completely melted.
- Add the splash of vanilla, and stir.
- Measure in the cinnamon, ginger and allspice. Stir until combined.
- Pour the cereal into the marshmallow mixture, and stir quickly until the cereal is coated.
- Add the remaining mini marshmallows, and stir until they’re scattered throughout.
- Pour the mixture to the prepared baking pan and gently spread the mixture into an even layer with a rubber spatula. (If the mixture begins sticking, spritz the spatula with the nonstick cooking spray.) Do not press down hard on the mixture, as your treats will be more compact.
- Let the treats cool completely, about 1 hour.
- Cut into squares with a sharp knife, and enjoy within 2-3 days.
Video
Notes
Nutrition

About the Author:
Erin Parker is a Southern gal living in Texas with her husband and two daughters. She started The Speckled Palate to share what she was cooking as a newlywed… and over the years, it’s evolved to capture her love for hosting. Specifically, the EASIEST, lowest key entertaining because everyone deserves to see their people and connect over good food. Learn more about her…


Before leaving a comment or rating, ask yourself: